How do I install the WP ADA Compliance Plugin?
Overview
WP ADA Compliance Check Pro is a stand alone plugin and must be installed separate from the basic version. Please refer to the applicable section below for installation instructions.
New Install
The WP ADA Compliance Check is easy to install:
- Begin by downloading the plugin from the www.wpadacompliance.com website. Do to a quirk with how Macintosh handles zip file, Macintosh users may need to zip the contents of the download. Refer to the Mac User section below.
- Login to your WordPress Website and choose “Plugins > Add New” from the dashboard menu. (Note: if you do not see this option you may not have administrative permissions on your website. Please contact your website administrator for assistance.)
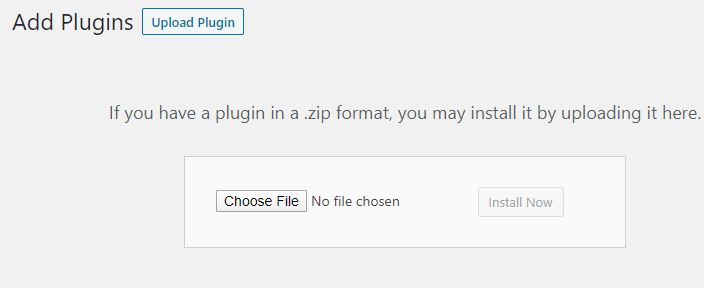
- Click on the “Upload Plugin” button
- Click “Choose File” to locate and upload the plugin file downloaded in step 1.
- Once the installation is complete, click the activate button.
- If not automatically taken there, go to Settings > Web Accessibility Settings
- Enter the license key received in an email and click “Activate”
- Choose your options and click “Save”.
Updates
Updates are installed from the plugin screen, like any other WordPress plugin. A notice will be displayed next to the plugin name in the list. Simply choose “update now”.
Installing Updates After a License Expires
Use the following instructions if you are installing an update after renewing an expired license:
- Go to the plugin settings page: Web Accessibility > Settings
- Choose the “License Key” button at the top of the page
- Enter your license key and click activate
- Go to the plugin page: Plugins > Installed plugins
- Scroll to the WP ADA Compliance Check plugin and click, “check for updates”
- Scroll to the WP ADA Compliance Check plugin again and click, “update”
Mac Users
You may run into the following issue if you are using a MAC:
I am using a MAC computer and when I download files they are not .zip anymore. The zip files automatically get unzipped in my mac when I download them. So how do I install the WordPress plugin without the .zip file.
The Solution
Do the following so your zip files don’t open automatically after you download them:
- Go into Safari Preferences.
- Page titled General.
- Scroll down to the bottom.
- Deselect the box with the text “Open safe files after downloading”.
- The plug-ins will now download as a .zip file which uploads seamlessly to WordPress.
The key is to upload the .zip file via the WordPress plugin uploader interface (not the unzipped folder)